Creating a database in the cPanel using MySQL Database Wizard
In this article, we explain the steps for creating databases in the cPanel using the MySQL Database Wizard application.
Introduction
In this tutorial, we will guide you through the necessary steps to create MySQL databases using the MySQL Database Wizard tool in the cPanel dashboard. This streamlined process is ideal for users who want to quickly set up databases and associate them with their web applications.
Requirements
To follow this guide, you will need:
- Hosting account login details (username and password).
- Access to the cPanel provided by Hostico.
Steps
1. Accessing the cPanel
- Log in to your cPanel account using the credentials provided by Hostico.
- Navigate to the Databases section and click on the "MySQL Database Wizard" option.

2. Creating a database
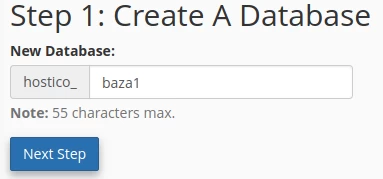
In the first step, fill in the field for the database name. The name can be a maximum of 54 characters and will include a prefix automatically generated based on the cPanel user.
Example: prefix_numebaza
3. Creating a user for the database
Enter a name for the database user (maximum 7 characters) and set a secure password. Alternatively, you can use the "Password Generator" button to automatically generate a strong password. Make sure to save the password in a safe place, as it will be required for the application's connection to the database.
Example: prefix_username
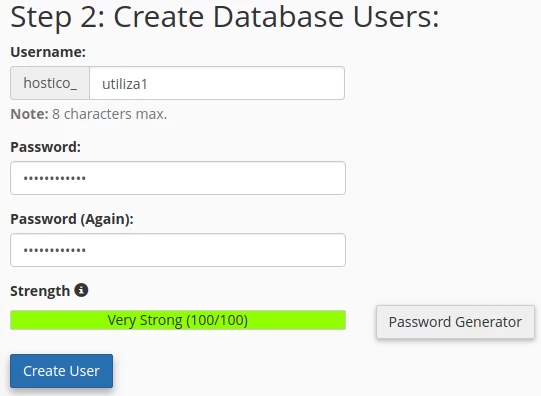
These three parameters (the database name, the user, and the password) are essential for configuring the connection between the web application and the database.
4. User Assignment to the Database
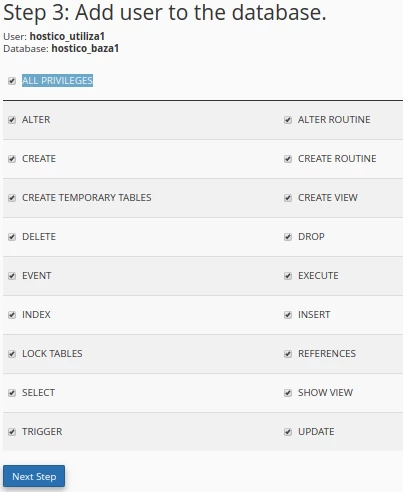
In this step, select the user and the previously created database, then grant all necessary permissions using the "ALL PRIVILEGES" option. After configuration, click on "Next Step".
5. Completing the process
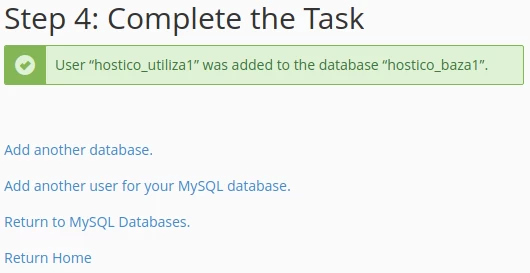
Congratulations! You have successfully created a database, an associated user, and connected them with the necessary permissions for data management. Upon completion, you have the following options available:
- Add another database: To create another database, follow the same steps.
- Add another user for your MySQL database: To add an additional user to the existing database.
- Return to MySQL Databases: To return to the list of already created databases.
- Return Home: To return to the main page of the cPanel dashboard.